A Tour of JMeter – Part 2
This is the second post in a series about Apache JMeter.
First Test Run
This tour is broken into several sections
- Installing and Recording
- First Test Run (This post)
- Improving the Test Run
- Advance Techniques
If you followed the first part of the series, you should have JMeter Installed and also have a recording of web actions from the browser. This post will use that recording and replay it in a load test fashion.
Running the test plan is a matter of
- Adding virtual users to simulate load for the plan
- Moving the recording into the test plan
- Running and Reviewing the results
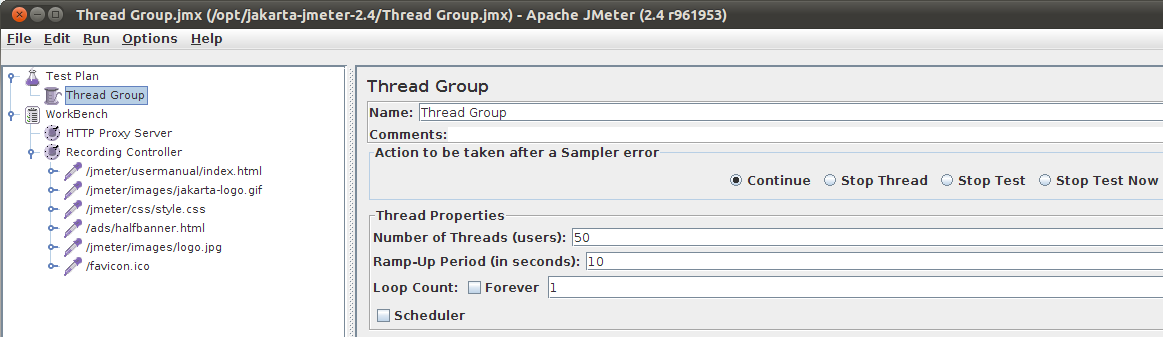
Add Virtual Users
- Add Users
- Right click on the Test Plan. Select Add -> Threads -> Thread Group.
- Edit Number of threads to be the number of users you would like to simulate. I’m using 50 users.
- Edit the Ramp-up period. Setting the value to 10 means in 10 seconds all 50 people will be on the site.
-
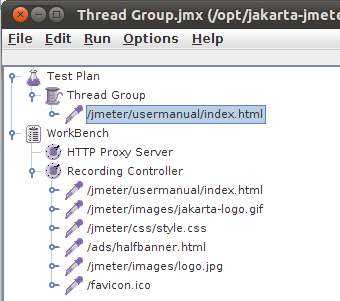
Configure Test Plan
The recording from part I showed all files that are downloaded when a request is made. You need to pick the items that make the most sense in order to reproduce the expected outcome. In this case. navigating to index.html had dependencies on css and images. So we really just need to add the index file to the test plan.
- Right Click on Recording Controller -> index.html and select Copy
- Right Click on Test Plan -> Thread Group and select Paste.
- Attach Report
- Right Click on Test Plan. Select Add -> Listener -> Summary Report

- Run
- Select Run -> Start
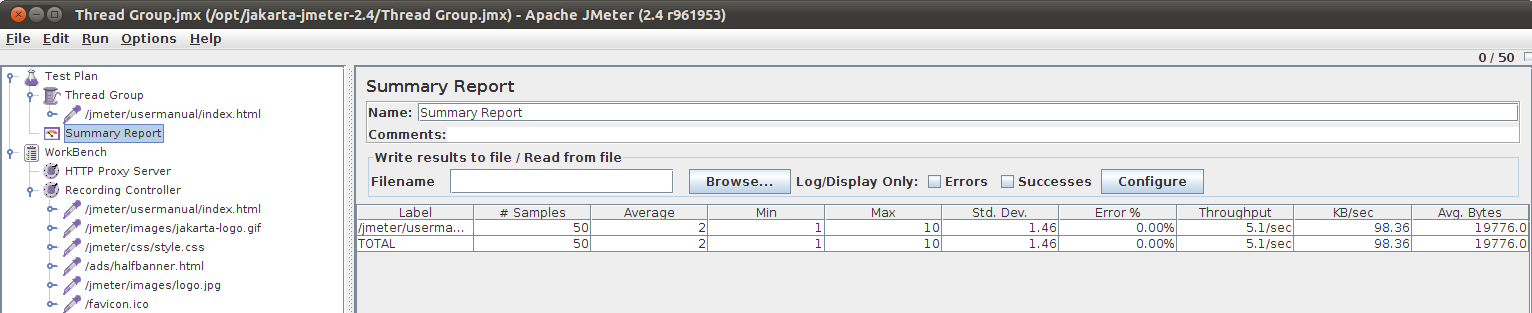
There you go. A load test that had 50 users playback a page from a recorded script. This is a very simple load test. Obviously there is room for improvement and creating more sophisticated tests.